Categories and favourites
How to add, rename and hide inventory categories in GarageBilling, and pin your favourite categories to the front of the item list.
Categories group your parts and labour, such as Engine & Mechanical or Brakes & Suspension. They make items quicker to find on the Inventory tab and when you add items to a bill.
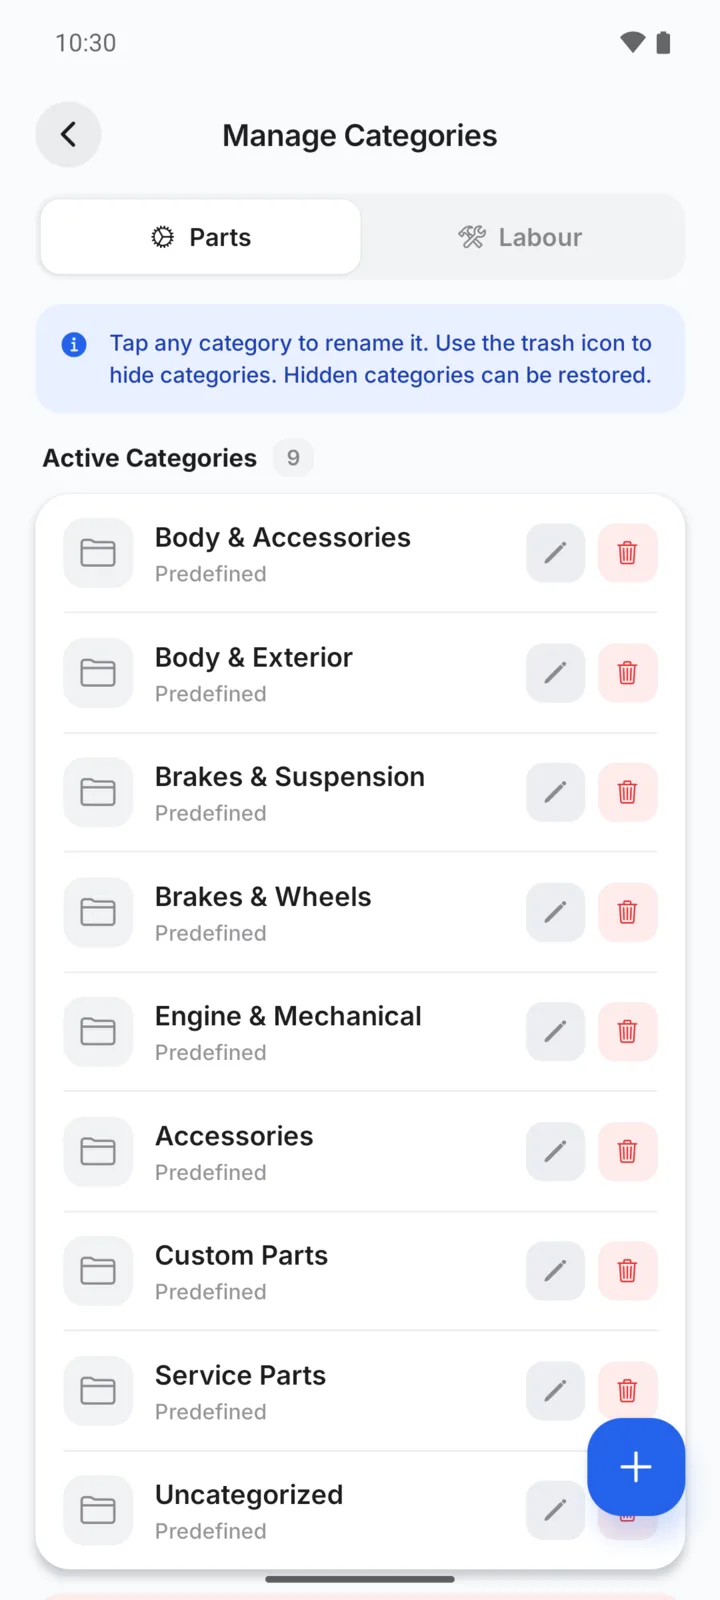
Open Manage Categories
On the Inventory tab, tap the folder icon at the top. Use the Parts and Labour switch to see each set of categories.
Add a category
Tap the blue + button, type the Category Name and tap Add Category. Two categories can't have the same name.
To put items in it, open each item in Inventory and pick the category under Item Details, or choose it when you add a new item.
Rename a category
Tap the category, or its pencil icon, type the new name and tap Save Changes.
- A category you added: the new name is used for all its items.
- One of GarageBilling's categories: you set the name you see, and the original name is shown underneath for reference.
Hide or delete a category
Tap the trash icon next to the category and confirm.
- One of GarageBilling's categories is hidden. Its items no longer appear when you add items to a bill. Hidden categories are listed under Deleted Categories, where you can tap Restore to bring one back.
- A category you added is deleted. Its items are not lost: they move to Uncategorized.
Pin your favourite categories
When you add items to a bill, the category chips run along the top of the item list. To keep your most-used categories first, tap the star on a category chip (or press and hold the chip). Pinned categories show a filled star and appear first, before Frequently Used. Tap the star again to unpin it.
Pins are saved to your account.